Sabtu, 25 Januari 2025

Building Your Dream Cajon: A Comprehensive Guide

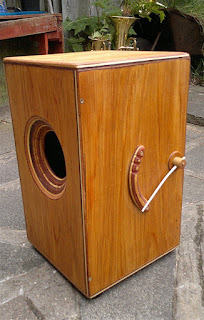
The rhythmic pulse of a cajon, that captivating box drum, can add a unique depth to any musical setting. Instead of buying one, why not craft your own? This guide walks you through building a custom cajon, empowering you to choose the wood, the sound, and the aesthetic that perfectly reflects your style. Prepare to embark on a rewarding journey, blending creativity with carpentry!

Choosing Your Timber: The Heart of the Cajon

The wood you select significantly impacts your cajon's sound. Hardwoods generally offer a brighter, crisper tone, while softer woods produce a warmer, deeper resonance. Consider these popular options:

Hardwoods for a Brighter Sound:

  • Birch: Offers a balanced tone with good projection and durability.
  • Maple: Known for its bright, clear sound and excellent resonance.
  • Oak: Provides a strong, resonant tone with a slightly warmer character than birch or maple.

Softer Woods for a Warmer Tone:

  • Pine: Offers a mellow, warm tone but may require added bracing for structural integrity.
  • Plywood (Birch or Poplar): A cost-effective option that provides a good balance of sound and strength; choose a higher-ply count for better durability.

Remember to source your wood from reputable suppliers, ensuring the planks are free from cracks, knots, or other imperfections that could compromise the cajon's structural integrity and sound quality.

Constructing the Cajon Body: Precision and Patience

Once you've selected your wood, meticulously measure and cut the six panels needed for the cajon's body. Accurate cuts are crucial for a properly assembled and resonant instrument. Use a miter saw or hand saw for precise cuts. For added stability, consider using a router to create rabbet joints (or dadoes) where the panels connect â€" these interlocking joints significantly increase the overall strength of the box.

Assemble the body using wood glue and clamps. Allow ample drying time before proceeding. Ensure all corners are square and tightly joined for optimal resonance. Once dry, carefully sand all surfaces to create a smooth finish, paying attention to the edges and corners to prevent splintering.

Crafting the Soundboard and Snare System: Defining the Sound

The soundboard is the beating heart of your cajon. A thinner soundboard generally produces a brighter, snappier sound, while a thicker one delivers a deeper, warmer tone. Cut the soundboard to fit snugly inside the cajon body. Carefully position it and secure it with wood glue.

For the snare system, you can use various materials to create that characteristic rattling sound. A popular choice is using thin strips of wood or metal, attached to the inside of the back panel. Experiment with different thicknesses and spacing to achieve your desired snare sound. Ensure the snare system is securely attached to avoid rattling noises that detract from the overall tonal quality.

Finishing Touches: Protecting and Personalizing Your Creation

Sand the entire cajon once more to ensure a smooth surface. Apply a finishâ€"such as varnish, polyurethane, or even shellacâ€"to protect your cajon from moisture and daily wear. Choose a finish that complements the wood's natural beauty or explore creative staining techniques to personalize your instrument. Allow the finish to cure completely before playing your cajon.

Congratulations! You've crafted a unique and personalized cajon. Enjoy the rich, resonant sound of your handmade instrument and the satisfaction of creating something truly special with your own two hands.

Constructing a Rustic Tabletop Shuffleboard with a Natural Wood Finish

This comprehensive guide details the process of building a rustic tabletop shuffleboard, emphasizing the use of natural wood and a minimally processed finish to accentuate the inherent beauty of the material. The project balances aesthetic appeal with functional design, offering a rewarding experience for woodworking enthusiasts of all skill levels. Careful attention to detail in each stage, from material selection to final finishing, is crucial for achieving a high-quality, durable, and visually striking shuffleboard.

I. Material Selection and Preparation

The choice of wood significantly impacts the final aesthetic and playability of the shuffleboard. For a truly rustic feel, consider using reclaimed wood, such as barn wood or salvaged lumber. Alternatively, new lumber with a pronounced grain pattern, such as pine, oak, or maple, can also yield excellent results. The key is to select wood with minimal defects that could compromise structural integrity or playing surface quality.

A. Lumber Selection and Sizing

For a standard tabletop shuffleboard, dimensions of approximately 48 inches long by 12 inches wide and 1.5 inches thick are recommended. However, these dimensions can be adjusted based on available space and personal preferences. It's crucial to select lumber that is consistently sized to ensure a level and stable playing surface. At least two boards are needed for the playing surface, and additional lumber is required for the sides and legs. For a more robust shuffleboard, using thicker lumber (2-inch or more) is advised. Ensure all wood is appropriately dried to prevent warping or cracking during and after construction.

B. Wood Treatment and Preparation

Before commencing construction, the selected lumber requires thorough preparation. This includes:

  • Planing: Using a hand plane or planer, smooth the surfaces of each board to ensure a consistent thickness and remove any imperfections.
  • Jointing: If using multiple boards for the playing surface, it is essential to joint the edges to create a perfectly aligned and flush surface. A jointer plane or table saw with a jointer fence is ideal for this task.
  • Sanding: Once joined, sand all surfaces using progressively finer grit sandpaper (starting with a coarser grit like 80 and moving up to 220 or finer) to create a smooth playing surface and prepare the wood for finishing.
  • Inspection: Thoroughly inspect each board for any remaining imperfections, knots, or cracks that could affect the shuffleboard's functionality or aesthetics. Address any issues before proceeding with assembly.

II. Construction and Assembly

The construction process requires precision and attention to detail. Accurate measurements and secure joinery are essential for a stable and level playing surface. Several approaches are viable, including utilizing dadoes, rabbets, or simply using wood glue and screws.

A. Creating the Playing Surface

This is the most critical aspect of the build. The playing surface must be perfectly flat and level for optimal gameplay. If using multiple boards, ensure they are perfectly aligned and glued together using a high-quality wood glue. Clamp the boards firmly together until the glue is fully cured. Once dried, thoroughly sand the playing surface to achieve a flawlessly smooth finish. Consider using a specialized sanding block for consistent pressure.

B. Building the Frame and Legs

Construct the frame and legs from the remaining lumber. The frame should be slightly larger than the playing surface to accommodate it. A sturdy frame is essential for stability and support. Use strong joinery techniques, such as mortise and tenon joints, dowel joints, or robust screws, to ensure the frame is securely assembled. The legs should be firmly attached to the frame, providing ample support to prevent wobbling during gameplay. Consider adding decorative elements to the legs for a more rustic appeal.

C. Securing the Playing Surface

Carefully position the playing surface onto the frame, ensuring it sits flush and level. Secure it using screws from underneath, countersinking them to allow for a smooth finish. Pre-drill pilot holes to prevent the wood from splitting. The screws should be appropriately sized and spaced to provide secure attachment without compromising the integrity of the playing surface.

III. Finishing and Detailing

The finishing process enhances both the aesthetic and protective qualities of the shuffleboard. A natural wood finish allows the grain and character of the wood to shine through while providing a durable protective layer.

A. Choosing a Finish

For a rustic, natural look, consider using a clear wood finish such as a polyurethane, tung oil, or shellac. These finishes will protect the wood from scratches, moisture, and everyday wear while allowing the natural wood grain to remain visible. Avoid using dark stains or paints, as these will obscure the natural beauty of the wood and detract from the rustic aesthetic. Multiple thin coats are preferable to one thick coat, ensuring even coverage and preventing dripping or runs.

B. Applying the Finish

Apply the chosen finish using a brush, rag, or spray gun, following the manufacturer's instructions carefully. Allow each coat to dry completely before applying the next. Lightly sand between coats with very fine grit sandpaper (320 or higher) to remove any imperfections and create a smoother, more uniform finish. Multiple thin coats will yield a more durable and even finish than one thick coat.

C. Adding Finishing Touches

Once the finish is completely dry and cured, consider adding some finishing touches to enhance the rustic aesthetic. This could involve adding simple metal corner protectors for additional durability, or incorporating subtle distressing techniques to further accentuate the rustic character of the wood. These details can elevate the shuffleboard from a functional piece to a statement piece that enhances any game room or entertainment space.

IV. Shuffleboard Pucks and Gameplay

While the construction of the shuffleboard is the focus, the selection of appropriate pucks is crucial for optimal gameplay. Use pucks specifically designed for shuffleboard, ensuring they are properly weighted and sized for your table dimensions. Proper puck selection significantly contributes to an enjoyable and competitive shuffleboard experience. Experiment with different puck materials to find the balance between glide and stopping power that best suits your playing surface and personal preference.

With careful planning, meticulous construction, and a thoughtful finishing process, you can build a beautiful and functional rustic tabletop shuffleboard that will provide years of enjoyment. Remember, this is a project that rewards patience and attention to detail. Enjoy the process and the satisfaction of creating a unique and personalized piece for your home.

Craft Your Dream Home: A Guide to DIY Wooden Wall Signs

Transform your living spaces with the rustic charm and personalized touch of handcrafted wooden wall signs! This detailed guide walks you through the process of creating unique, eye-catching pieces that perfectly reflect your style. Forget generic store-bought décor â€" unleash your creativity and build something truly special for your home.

Choosing Your Wood and Design

The foundation of your sign lies in the wood you select. Consider the overall aesthetic you're aiming for. Reclaimed wood lends a vintage, weathered look, while smooth, sanded pine offers a cleaner, more modern feel. Think about the thickness â€" thicker wood provides a more substantial feel, while thinner boards are easier to handle for beginners. Before you even pick up a saw, sketch your design! Consider the font, the message, and any additional elements like stencils, paint, or embellishments. A simple phrase, a favorite quote, or even a personalized family name will work beautifully. Don't be afraid to experiment!

Selecting the Perfect Wood Type

The options are vast! Pine is readily available and affordable, making it a popular choice. However, oak, maple, and even plywood offer unique grain patterns and durability. If you’re aiming for a rustic vibe, explore reclaimed barn wood for an authentic, character-filled look. Consider the size of your desired sign when choosing your wood; larger projects require larger, more stable pieces.

Gathering Your Supplies and Tools

Before you dive into the creative process, assemble your essential tools and materials. This will streamline your workflow and prevent frustrating interruptions. A well-stocked workspace ensures a smoother, more enjoyable experience. Don't underestimate the importance of proper preparation!

Essential Tools and Materials:

  • Wooden board(s) of your chosen type and size.
  • Pencil for sketching your design.
  • Sandpaper (various grits for smoothing).
  • Saw (hand saw, jigsaw, or circular saw, depending on your skill level and the wood’s thickness).
  • Drill with drill bits (if adding hanging hardware).
  • Paint or stain of your choice.
  • Paintbrushes or stencils.
  • Measuring tape and ruler.
  • Screws or nails (for hanging).
  • Optional embellishments: buttons, beads, twine, etc.

Crafting Your Wooden Wall Sign: A Step-by-Step Guide

With your supplies ready, it’s time to bring your vision to life! Start by sanding the wood to create a smooth surface. Then, carefully transfer your design onto the wood using a pencil. If you're using a stencil, secure it firmly to the wood before painting. Let the paint dry completely before adding any embellishments. Finally, drill pilot holes and attach hanging hardware to the back of the sign. Remember to take your time and enjoy the process â€" the result will be worth it!

Adding Personal Touches

Let your personality shine through! Incorporate elements that reflect your unique style. Consider adding a distressed finish for a vintage look, or use metallic paints for a modern twist. You could even incorporate natural elements like dried flowers or leaves pressed into the wood before painting.

Hanging Your Masterpiece

Congratulations, you've created a stunning DIY wooden wall sign! Now, find the perfect spot in your home to showcase your handiwork. Consider the lighting and the surrounding décor to create a cohesive and visually appealing display. Admire your creation â€" the pride you feel is well-deserved! Your home deserves the unique touch only a handmade piece can offer.

Jumat, 24 Januari 2025

DIY Wooden Trays for Serving and Display: A Comprehensive Guide

Wooden trays, crafted with care and personalized touches, offer a versatile and aesthetically pleasing addition to any home. Their functionality extends beyond simple serving; they serve as elegant display pieces, organizers, and even charming gifts. This comprehensive guide will delve into the process of creating your own unique wooden trays, encompassing material selection, design considerations, construction techniques, and finishing options. Whether you are a seasoned woodworker or a novice embarking on your first project, this guide will empower you to construct beautiful and functional trays tailored to your specific preferences.

Choosing Your Materials: A Foundation for Success

The success of any woodworking project hinges on the quality of the materials used. For crafting durable and attractive wooden trays, careful consideration must be given to wood selection, hardware, and finishing products.

Selecting the Wood: Strength and Aesthetics

The type of wood you choose will significantly impact both the durability and aesthetic appeal of your tray. Hardwoods such as oak, maple, walnut, and cherry offer superior strength and resistance to wear, making them ideal for trays intended for frequent use. These woods also possess distinct grain patterns and colours that contribute to the overall visual appeal. Softwoods like pine or fir are more readily available and less expensive, but they are less durable and prone to scratches and dents. Your choice should depend on the intended use of the tray and your budget.

Consider the following factors when selecting your wood:

  • Durability: Hardwoods offer greater durability and resistance to scratches.
  • Aesthetic Appeal: Different woods possess unique grain patterns and colours.
  • Workability: Some woods are easier to work with than others.
  • Cost: Hardwoods generally cost more than softwoods.
  • Availability: Consider the availability of your chosen wood in your local area.

Essential Hardware: Completing the Design

The hardware you choose plays a crucial role in both the functionality and aesthetics of your tray. Handles are particularly important; they should be comfortable to grip and securely attached. Consider the style of your tray when selecting handles; simple, minimalist handles complement modern designs, while ornate handles add a touch of elegance to more traditional styles. The material of the handles should also be carefully considered. Metal handles offer durability and a modern aesthetic, while wooden handles provide a cohesive and natural look. Ensure the chosen hardware is compatible with the wood type and construction method.

Finishes: Protection and Enhancement

The finishing process is critical in protecting your wooden tray from moisture, scratches, and everyday wear and tear. A high-quality finish enhances the wood's natural beauty while providing a protective barrier. Various finishes are available, each with its own advantages and disadvantages.

  • Oil-based finishes: These offer excellent protection and enhance the wood's natural colour and grain.
  • Water-based finishes: These are environmentally friendly and less odorous than oil-based finishes.
  • Polyurethane: This provides a durable, hard-wearing finish, offering excellent protection against scratches and moisture.
  • Shellac: A traditional finish that produces a warm, amber tone.
  • Wax: Offers a subtle finish and enhances the wood’s natural beauty; provides less protection than other finishes.

Designing Your Tray: Form and Function

Before you begin construction, carefully plan the design of your tray. Consider the dimensions, shape, and style to ensure it meets your functional and aesthetic requirements. Sketching your design on paper is a valuable step, allowing you to experiment with different shapes and sizes before committing to the actual construction.

Dimensions and Shape: Considerations for Functionality

The dimensions of your tray will depend on its intended use. A serving tray should be large enough to comfortably hold plates and glasses, while a smaller tray might be suitable for displaying smaller items. The shape of your tray can also be varied. Rectangular trays are versatile and practical, while square and circular trays offer a more unique aesthetic. Consider the overall dimensions in relation to the chosen wood; avoid designs that require excessive cutting or joinery that may compromise the structural integrity of the tray.

Style and Aesthetics: Reflecting Personal Taste

The style of your tray should reflect your personal taste and the overall aesthetic of your home. A rustic tray might feature distressed wood and simple handles, while a modern tray could incorporate clean lines and sleek metal hardware. Consider incorporating decorative elements, such as inlays or carvings, to add a unique touch. Remember that the style should complement the intended use and the overall setting where the tray will be placed.

Construction Techniques: Bringing Your Design to Life

Once your design is finalized, it's time to begin construction. Several techniques can be used to build a wooden tray, ranging from simple to more complex methods. Choose the technique that best suits your skill level and the complexity of your design.

Simple Tray Construction: Box Joint or Butt Joint

For a simpler tray, you can utilize a box joint or butt joint construction method. The box joint offers superior strength, while the butt joint is easier to construct but requires additional reinforcement. Both methods involve assembling the sides of the tray and attaching a bottom panel. Carefully plan the cuts and ensure accurate measurements to ensure a square and level tray.

Advanced Tray Construction: Miter Joints and Dovetail Joints

More intricate tray designs may benefit from the use of miter joints or dovetail joints. Miter joints create a visually appealing angled joinery; however, they require precision cutting and often require additional reinforcement to maintain strength. Dovetail joints are the strongest type of woodworking joint, but they require significant skill and experience. These more complex methods offer greater structural integrity and a more refined aesthetic.

Finishing Touches: Enhancing and Protecting Your Creation

Once the tray is constructed, the finishing process is crucial for both its protection and aesthetic appeal. Proper finishing will protect the wood from moisture damage, scratches, and everyday wear and tear. It also enhances the wood’s natural beauty and can contribute to the overall aesthetic of the piece.

Sanding: Smoothing the Surface

Sanding is essential to achieve a smooth surface prior to applying any finish. Begin with a coarser grit sandpaper (e.g., 80-grit) and progressively move to finer grits (e.g., 120-grit, 220-grit) to eliminate any imperfections and create a smooth, even surface. Thorough sanding is crucial for a flawless final finish.

Applying the Finish: Protection and Enhancement

Apply the chosen finish according to the manufacturer’s instructions. Multiple coats may be necessary to achieve the desired level of protection and depth of colour. Allow ample drying time between coats. Ensure even coverage to avoid uneven patches or drips. The choice of finish significantly impacts the final appearance and durability of the tray.

Adding Handles and Hardware: Completing the Functional Design

Once the finish is completely dry, attach the chosen handles and any other hardware. Use appropriate screws or fasteners to ensure a secure attachment. Ensure the handles are securely fastened and are positioned ergonomically for comfortable use.

By following these steps, you can create stunning, handcrafted wooden trays that serve as both functional serving pieces and elegant display items for years to come. The process is rewarding, allowing you to personalize your creation and inject your individual style into every detail. Remember to prioritize safety throughout the entire process, using appropriate safety equipment and adhering to safe woodworking practices.

Building Your Dream Wooden Outdoor Furniture: A Comprehensive Guide

The scent of freshly cut wood, the satisfying thud of hammer meeting nail â€" building your own outdoor furniture offers a rewarding blend of creativity and craftsmanship. This guide walks you through the process, empowering you to craft durable and stylish pieces that will enhance your outdoor space for years to come. Forget flimsy store-bought options; let's build something truly special!

Planning Your Project: Choosing Design and Materials

Before you even touch a saw, careful planning is crucial. Start by selecting a design. Numerous free plans are available online, ranging from simple benches to intricate picnic tables. Consider your skill level and choose a project that aligns with your abilities. Beginners might start with a straightforward design, while experienced woodworkers can tackle more complex projects. Next, source your lumber. Pressure-treated lumber offers excellent weather resistance for outdoor use, but cedar and redwood are also popular choices for their natural beauty and durability. Calculate the quantity needed based on your chosen plans, adding extra for potential mistakes or cuts.

Choosing the Right Wood

Your choice of wood significantly impacts the furniture's longevity and aesthetic appeal. Pressure-treated pine provides excellent durability and resistance to rot and insects, making it an ideal, budget-friendly option for most outdoor projects. However, for a more luxurious look, consider cedar or redwood. These naturally resistant woods offer beautiful grain patterns and a rich reddish hue, but they come with a higher price tag. Remember to always buy slightly more wood than your plans require to account for imperfections and potential mistakes during the cutting and assembling process.

Gathering Your Tools and Supplies

Building sturdy outdoor furniture requires the right tools. Essential tools include:

  • Measuring tape
  • Pencil
  • Circular saw or hand saw
  • Drill with various drill bits
  • Screwdriver (or impact driver)
  • Safety glasses and hearing protection
  • Clamps
  • Wood glue
  • Exterior-grade screws or bolts
  • Sandpaper (various grits)
  • Wood stain or sealant (optional)

Having all your tools readily accessible before you begin significantly streamlines the building process and prevents frustrating delays.

Construction: Cutting, Assembling, and Finishing

With your plan, materials, and tools prepared, it's time to build! Begin by carefully cutting the lumber according to your chosen plans. Accurate cuts are paramount for a structurally sound and aesthetically pleasing piece. Use clamps to secure pieces together while applying wood glue and driving in screws or bolts. Take your time and ensure each joint is tight and secure. Once assembled, sand all surfaces smoothly, paying attention to any rough edges or splinters. Finally, apply a protective finish such as wood stain or sealant to enhance the furniture's durability and beauty, protecting it from the elements.

Finishing Touches

The finishing touches are what truly elevate your project from functional to stunning. Apply a high-quality exterior wood stain or sealant to protect the wood from moisture, UV rays, and insect damage. Choose a stain that complements your outdoor space and personal style. Remember to follow the manufacturer's instructions carefully for best results. Once the stain has dried completely, admire your handiwork â€" a testament to your skill and dedication. Now you can relax and enjoy your beautiful, hand-crafted outdoor furniture.

Enjoy Your Creation!

Building your own outdoor furniture is a rewarding experience. You've invested time, effort, and skill into creating a unique piece that reflects your personality and enhances your outdoor living space. Now sit back, relax, and enjoy the fruits of your labor â€" a beautiful, durable, and one-of-a-kind addition to your home.

The Enduring Elegance of Personalized Wooden Signs: A Gift of Lasting Significance

In the realm of thoughtful gift-giving, few presents convey personalized sentiment and enduring quality quite like a handcrafted wooden sign. Beyond the superficial charm of a readily available trinket, a bespoke wooden sign offers a tangible representation of care, creativity, and lasting memory. This article explores the multifaceted artistry and emotional resonance of personalized wooden signs, examining their suitability as gifts for family and friends, and delving into the nuanced considerations involved in their creation and presentation.

The Allure of Personalized Wooden Signs: A Timeless Appeal

The enduring appeal of wooden signs transcends fleeting trends. Their rustic charm, coupled with the potential for infinite customization, ensures that each piece is a unique expression of artistic intent and personal connection. The inherent warmth of the wood itself, whether the rich tones of oak, the subtle grain of pine, or the exotic beauty of mahogany, contributes significantly to the overall aesthetic. This tactile quality, in contrast to the cold smoothness of many mass-produced items, creates a tangible sense of artistry and handcrafted attention to detail.

The Craftsmanship and Materials

The creation of a personalized wooden sign is a process steeped in meticulous craftsmanship. Selecting the appropriate wood is the crucial first step. Different wood types offer unique characteristics: some boast a robust durability suitable for outdoor use, while others lend themselves to intricate detailing and delicate engravings. The skilled artisan will carefully choose the wood based on the intended design and the desired level of rusticity or refinement. The subsequent processes, from cutting and shaping to sanding and finishing, all contribute to the final product's quality and longevity. The choice of finishing techniques, such as staining, painting, or sealing, can further enhance the sign's aesthetic appeal and protect it from the elements, ensuring its beauty endures for years to come.

Design and Personalization: A Canvas of Expression

The true artistry of personalized wooden signs lies in their capacity for infinite customization. They are not merely functional items; they are canvases for expressing personal sentiments and creating lasting mementos. A simple yet elegant script may suffice for a wedding anniversary gift, while a more elaborate design featuring intricate carvings or painted imagery might be suitable for a milestone birthday. The possibilities are truly limitless. The process of design and personalization involves close collaboration between the artisan and the client, ensuring that the final product reflects the client's unique vision and heartfelt message. This collaborative process itself adds a layer of significance to the gift, transforming it into a truly unique and cherished keepsake.

Choosing the Perfect Personalized Wooden Sign: A Guide for Gift-Giving

Selecting the ideal personalized wooden sign requires careful consideration of the recipient, the occasion, and the intended message. The sign's design should be carefully curated to reflect the recipient's personality, interests, and relationship with the giver. A thoughtful selection will elevate the gift beyond a mere present, transforming it into a treasured heirloom that will be passed down through generations.

Considerations for Family Members

For family members, personalized wooden signs offer a powerful means of expressing enduring familial bonds. A sign commemorating a family gathering or a significant life event, such as a wedding, birth, or anniversary, becomes a lasting reminder of shared experiences and cherished moments. For a parent, a sign bearing their favorite quote or a cherished family motto can serve as a constant source of comfort and inspiration. For siblings, a sign commemorating a shared childhood memory or inside joke can evoke nostalgic sentiments and reaffirm their sibling bond.

Selecting Signs for Friends: Celebrating Connections

When selecting a personalized wooden sign for a friend, consider their individual tastes and preferences. A sign reflecting their hobbies, passions, or a shared memory will resonate deeply and showcase the thoughtfulness behind the gift. For example, a sign incorporating a favorite quote from a beloved book or movie, or a design inspired by a shared travel experience, can effectively communicate the depth of the friendship.

Occasion-Specific Designs: Marking Life's Milestones

The occasion itself plays a pivotal role in determining the design and message of the personalized wooden sign. A wedding sign might feature the couple's names and wedding date, while a housewarming gift might showcase a welcoming message or a personalized family name. A retirement sign could reflect the recipient's professional achievements and new chapter in life, and a birthday sign could incorporate a meaningful quote or a playful design relevant to the recipient's age or interests.

Beyond the Gift: The Lasting Legacy of Personalized Wooden Signs

Personalized wooden signs are more than just gifts; they are lasting legacies. Their inherent durability ensures they will withstand the passage of time, serving as tangible reminders of significant events, cherished relationships, and heartfelt sentiments. They become treasured heirlooms, passed down through generations, carrying with them the stories and memories they represent. Unlike fleeting trends, the rustic charm and handcrafted quality of a wooden sign ensure that it will retain its beauty and significance for years, even decades, to come. This enduring quality is a testament to the thoughtfulness and care invested in its creation and selection, making it a gift that surpasses mere material value, offering instead a lasting legacy of love, appreciation, and connection.

Care and Preservation: Ensuring Longevity

To ensure the longevity of your personalized wooden sign, proper care and preservation are essential. Regular dusting will help maintain its aesthetic appeal, while protective coatings, if applied during the crafting process, will offer additional protection against the elements. For outdoor signs, periodic maintenance and reapplication of sealant may be necessary to preserve the wood's integrity and prevent damage. With proper care, your personalized wooden sign will remain a cherished possession for generations, a testament to the enduring power of handcrafted artistry and the enduring strength of personal connections.

The Emotional Impact: A Gift from the Heart

Ultimately, the greatest value of a personalized wooden sign lies in its emotional impact. It's a gift that transcends material value, conveying a deep sense of care, thoughtfulness, and enduring affection. The time and effort invested in selecting the perfect design, choosing the right wood, and crafting a unique piece creates a gift that speaks volumes about the relationship between the giver and the recipient. It's a gift that's felt as much as it's seen, a tangible manifestation of love, appreciation, and lasting connection â€" a gift that truly resonates from the heart.

In conclusion, the personalized wooden sign stands as a testament to the enduring power of handcrafted artistry and the timeless appeal of personalized gifts. Its rustic charm, coupled with the potential for infinite customization, makes it a truly unique and meaningful present for family and friends. The legacy of such a gift extends far beyond the occasion itself, transforming into a treasured heirloom that carries with it cherished memories and enduring connections for generations to come.

Craft a Charming Coat Rack: A Step-by-Step Guide

Transform your entryway or mudroom from chaotic to charming with a handcrafted wooden coat rack. This project, perfect for DIY enthusiasts of all skill levels, combines rustic appeal with practical functionality. Forget flimsy metal racks; you'll create a sturdy, personalized piece that adds warmth and character to your home. This guide provides a comprehensive walkthrough, empowering you to build a coat rack you'll be proud to display.

Gathering Your Materials and Tools

Before you begin, assemble your materials. A successful project hinges on proper preparation! This list ensures you have everything you need at your fingertips. Don't skip this step; it saves time and frustration later.

Essential Materials:

  • Wood: Choose a sturdy wood like pine, oak, or cedar. Consider the dimensions of your desired rackâ€"a 36-inch length is a good starting point. You'll need one long piece for the main rack and several shorter pieces for the hooks (depending on the number of hooks you desire).
  • Hooks: Select strong, aesthetically pleasing hooks. Metal hooks are durable and readily available. Consider the styleâ€"simple, ornate, or even repurposedâ€"to match your home's decor.
  • Wood screws: Use screws appropriate for your chosen wood type to ensure a secure hold for the hooks.
  • Wood glue: This adds extra strength and stability to your construction.
  • Wood stain or paint (optional): Personalize your coat rack with a stain to enhance the wood's natural beauty or paint it a vibrant color.
  • Sandpaper: Various grits (e.g., 80, 120, 220) will smooth the wood for a professional finish.

Essential Tools:

  • Measuring tape and pencil: Accurate measurements are paramount for a well-proportioned rack.
  • Saw (circular saw or hand saw): Cut the wood to your desired lengths.
  • Drill with drill bits: Pre-drill holes for the screws to prevent wood splitting.
  • Screwdriver: Securely fasten the hooks.
  • Clamps (optional): Keep the pieces firmly in place while the glue dries.
  • Safety glasses and dust mask: Protect yourself from flying debris and wood dust.

Constructing Your Wooden Coat Rack

Now comes the fun part! Follow these steps carefully, taking your time for a quality build. Remember, precision makes a difference.

Cutting and Preparing the Wood:

Begin by cutting your main wood piece to the desired length. Then, cut the shorter pieces for the hooks to uniform size. Sand all pieces thoroughly, starting with coarser grits and progressing to finer ones for a smooth surface. This step significantly impacts the final look and feel.

Attaching the Hooks:

Use your pencil to mark the placement of your hooks along the main piece. Pre-drill pilot holes to prevent the wood from splitting when you drive in the screws. Apply wood glue to the base of each hook before screwing it into place. Tighten the screws securely, ensuring the hooks are level and evenly spaced.

Finishing Touches:

Once the hooks are firmly attached, apply your chosen stain or paint. Follow the manufacturer's instructions carefully for best results. Allow ample drying time before handling. Consider adding a protective sealant for durability and longevity.

Mounting and Enjoying Your New Coat Rack

Finally, mount your handcrafted coat rack to the wall. Select sturdy wall anchors appropriate for your wall type to support the weight. Step back and admire your handiwork! Your new, personalized coat rack effortlessly combines practicality and style, adding a touch of rustic charm to your entryway or mudroom. Enjoy the satisfaction of a job well done and the added organization it provides.

Crafting Exquisite Wooden Coasters with Engraved Patterns: A Comprehensive Guide

The creation of personalized wooden coasters presents a rewarding opportunity to blend artistry with functionality. This comprehensive guide details the process of designing, crafting, and finishing elegant engraved wooden coasters, providing a detailed exploration of each stage for both novice and experienced woodworkers.

I. Material Selection and Preparation

A. Choosing the Right Wood

The selection of wood significantly impacts the final aesthetic and durability of the coasters. Hardwoods are generally preferred for their resilience and ability to withstand the wear and tear of daily use. Popular choices include:

  • Maple: Offers a smooth, light-colored surface that readily accepts engraving and stains well.
  • Cherry: Provides rich, warm tones and exhibits beautiful grain patterns that enhance the engraved design.
  • Walnut: Known for its dark, luxurious color and intricate grain, making it ideal for sophisticated coasters.
  • Oak: A durable and readily available hardwood with a distinctive grain structure that adds character.

Consider the desired aesthetic when selecting your wood. Lighter woods highlight the engraving more prominently, while darker woods provide a more subtle contrast.

B. Wood Preparation: Cutting and Sanding

Once the wood is selected, it must be carefully prepared. Begin by cutting the wood into square or round blanks using a table saw or band saw, ensuring precise dimensions for uniformity. The standard size for coasters is approximately 4 inches in diameter or square, but this can be adjusted to suit personal preference.

After cutting, the edges of the blanks must be meticulously smoothed. Start with a coarser grit sandpaper (around 80-100 grit) to remove any significant irregularities. Progressively move to finer grits (120, 180, 220, and optionally higher) for a flawlessly smooth surface. Ensure consistent sanding to avoid visible imperfections. Pay particular attention to the edges to create a comfortable and polished finish.

II. Design and Engraving

A. Design Considerations

The design is the cornerstone of a unique coaster. Consider various factors when developing your pattern:

  • Simplicity vs. Complexity: Beginners may find simpler designs easier to engrave. More intricate designs require greater skill and precision.
  • Style and Theme: Align the design with the overall aesthetic you are aiming for (e.g., minimalist, geometric, floral, nature-inspired).
  • Scale and Proportion: Ensure the design is appropriately scaled for the coaster size, avoiding overcrowding or overly large elements.

Utilize design software or hand-drawn sketches to create your pattern. Consider transferring the design onto the wood using tracing paper and pencil for accurate engraving.

B. Engraving Techniques

Several methods can be employed for engraving wooden coasters:

  • Hand Engraving Tools: These tools offer a more traditional approach and allow for precise control, but require considerable skill and patience. Various tools are available for different engraving depths and styles.
  • Rotary Engraving Tools: Electric rotary tools equipped with engraving bits provide a faster and more efficient method, especially for intricate designs. Different bit sizes and shapes allow for diverse engraving effects.
  • Laser Engraving: Laser engraving offers the highest precision and speed, ideal for complex designs and mass production. However, this requires specialized equipment.

Regardless of the chosen method, practice on scrap wood before engraving the final coasters to perfect your technique and achieve the desired depth and consistency.

III. Finishing and Protection

A. Cleaning and Preparation

After engraving, carefully remove any wood dust or debris from the coaster surface using a brush or compressed air. This is crucial for ensuring a smooth and even finish. Any remaining residue can interfere with the application of the finish.

B. Applying a Protective Finish

A protective finish is essential for safeguarding the coaster from moisture, stains, and wear. Several options exist:

  • Mineral Oil: A food-safe option that enhances the wood's natural beauty and provides moderate protection. Apply several coats, allowing each to dry thoroughly before applying the next.
  • Polyurethane: Offers superior protection against water and wear, creating a durable and glossy finish. Choose a water-based polyurethane for a less pungent odor and faster drying time.
  • Shellac: A traditional finish that provides a warm, amber tone and excellent protection. It's more time-consuming to apply than polyurethane but offers a unique aesthetic.

Apply the chosen finish according to the manufacturer's instructions, ensuring even coverage to prevent uneven absorption and potential water damage. Allow ample drying time between coats for optimal results. Lightly sanding between coats with fine-grit sandpaper can create an ultra-smooth surface.

IV. Quality Control and Refinement

Before declaring the coasters complete, perform a thorough inspection. Check for any imperfections in the engraving, sanding marks, or uneven finish. Address any remaining issues with additional sanding, polishing, or touch-ups to the finish. The goal is to create coasters that are both aesthetically pleasing and functional.

Once you are satisfied with the quality, allow the coasters to cure completely according to the finish's instructions. This ensures that the finish is fully hardened and provides lasting protection. The final product represents a blend of craftsmanship and artistic expression, transforming simple wood blanks into unique and functional pieces.

With meticulous attention to detail throughout each stage, you can create exquisite engraved wooden coasters that serve as both practical household items and captivating works of art, reflecting your individual creativity and skill.

Kamis, 16 Januari 2025

Must-Try DIY Wooden Bread Box Ideas for a Stylish Kitchen

Hey there, fellow kitchen enthusiasts! So, you're thinking about crafting your own wooden bread box? Fantastic! It's a project that's both rewarding and incredibly practical. Not only will you end up with a beautiful, bespoke addition to your kitchen, but you'll also get to keep your bread fresher for longer. Let's dive into some seriously inspiring DIY bread box ideas that will transform your kitchen from drab to fab!

Choosing Your Wood: The Foundation of Your Bread Box

The type of wood you choose will massively impact the final look and feel of your bread box. Don't stress â€" there's no single "right" answer. It really comes down to your personal style and budget.

Classic & Elegant Options

Pine is a super popular choice. It's relatively inexpensive, readily available, and easy to work with, making it perfect for beginners. Plus, its light color gives a clean, airy feel. Oak, on the other hand, brings a touch of rustic elegance. It's a harder wood, giving your bread box a more durable and luxurious feel. Just be prepared for a slightly tougher build!

Unique & Rustic Choices

If you're after something a bit more unique, consider reclaimed wood. This adds a ton of character and sustainability to your project. Think of the stories those old planks could tell! You might find beautifully weathered pieces that need a little TLC, adding an even more personal touch. Cedar is another excellent choice, especially if you live in a humid climate. Its natural oils act as a repellent against insects and moisture, keeping your bread even fresher.

Design Inspiration: From Rustic Charm to Modern Minimalism

The fun part! This is where you get to unleash your creativity. Let's explore some different styles to get your imagination flowing:

The Classic Farmhouse Bread Box

Think simple, clean lines and a rustic feel. A hinged lid, maybe some charming metal handles, and a slightly distressed finish. You can even add some decorative elements like carved details or a painted design. Imagine it sitting proudly on your countertop, radiating warmth and charm.

Modern Minimalist Bread Box

For a more contemporary look, opt for sleek, minimalist lines. Think clean, straight edges, a simple sliding lid, and a neutral finish. Maybe use a stain to highlight the natural grain of the wood, keeping it understated yet sophisticated.

Shaker-Style Bread Box

Shaker style is all about simplicity and functionality. Expect clean lines, simple joinery, and a focus on the natural beauty of the wood. A Shaker-style bread box would be a timeless addition to any kitchen, offering both beauty and practicality.

Rustic Pallet Bread Box

Repurposing old pallets is an eco-friendly and budget-friendly option. Just make sure to properly clean and sand the wood before you start building. This style often involves visible wood grain and texture, contributing to a uniquely rustic aesthetic.

Essential Tools & Materials

Before you dive in, make sure you have all the necessary tools and materials. This will make the building process smoother and more enjoyable.

Tools: You'll likely need a saw (circular saw or hand saw), a drill, sandpaper (various grits), clamps, a measuring tape, a pencil, and maybe a router (depending on the complexity of your design).

Materials: Besides your chosen wood, you'll need screws, wood glue, wood finish (stain, varnish, or paint), and possibly hinges, handles, or other hardware.

Step-by-Step Guide (Generic Example)

While the exact steps will depend on your chosen design, here's a general outline to guide you:

  1. Plan your design and cut your wood: Draw up a simple plan, including dimensions, and cut your wood pieces accordingly.
  2. Assemble the box: Use wood glue and screws to join the sides, bottom, and back of your bread box. Clamps will help keep everything in place while the glue dries.
  3. Attach the lid: If your design includes a hinged lid, attach the hinges securely using screws. Ensure they allow for smooth opening and closing.
  4. Sand everything smooth: Use sandpaper to smooth out any rough edges or imperfections. Start with a coarser grit and gradually move to a finer grit for a super smooth finish.
  5. Apply your chosen finish: Stain, varnish, or paint your bread box to achieve your desired look. Make sure to follow the manufacturer's instructions carefully for optimal results. Apply multiple coats for better protection and durability.
  6. Add hardware (if applicable): Attach handles or other hardware if needed.

Remember, this is a general guide. You'll likely find more detailed instructions specific to your chosen design online or in woodworking books. Don’t be afraid to adapt and adjust as you go! That's part of the fun!

Adding Personal Touches: Make it Your Own!

Here are some ideas to truly make your bread box unique:

  • Inlay different types of wood: Create decorative patterns by inlaying contrasting woods.
  • Carve decorative details: Add a touch of artistry with carved designs.
  • Paint a custom design: Express your personality with a hand-painted design.
  • Add a magnetic closure: For a modern and sleek look.
  • Use unique hardware: Choose handles, hinges, and latches that reflect your style.

The possibilities are truly endless!

Frequently Asked Questions

Q: What kind of finish should I use?

A: That depends on your preference and the look you want to achieve. Varnish offers good protection and enhances the natural wood grain. Stain adds color while still showcasing the wood's texture. Paint provides a completely different look, offering vibrant colors and a more modern aesthetic.

Q: How do I ensure my bread box is airtight?

A: While a perfectly airtight seal might be difficult to achieve with a DIY bread box, using good quality wood and ensuring a tight-fitting lid will significantly improve its ability to keep bread fresh. Consider adding a layer of beeswax or food-safe sealant around the lid to help seal any small gaps.

Q: Can I use reclaimed wood for my bread box?

A: Absolutely! Reclaimed wood adds character and sustainability. Just be sure to clean and sand it thoroughly to remove any dirt, debris, or splinters. Also, check for any signs of pest infestation before using it.

Q: How difficult is this project for a beginner?

A: The difficulty depends on your chosen design. A simple, straightforward design is perfect for beginners. More complex designs with intricate joinery or carvings will require more experience. Don't be afraid to start small and build your skills gradually.

Q: How long does it take to build a DIY bread box?

A: This depends on the complexity of the design and your experience level. A simple bread box could take a few hours to a day to build, while more intricate projects could take several days or even longer.

Happy crafting, and may your kitchen be filled with the delightful aroma of freshly baked bread, kept perfectly preserved in your handmade masterpiece!

DIY Wooden Bread Box Ideas for Maintaining Bread Freshness

The aroma of freshly baked bread is a culinary delight, but maintaining its softness and preventing premature staling is a challenge many home bakers face. While commercially available bread boxes exist, constructing a DIY wooden bread box offers a rewarding experience, allowing for personalization and customization to match individual kitchen aesthetics. This comprehensive guide explores various DIY wooden bread box designs, providing detailed instructions and considerations for ensuring optimal bread preservation.

Choosing Your Wood and Tools

The selection of wood significantly impacts the longevity and aesthetic appeal of your bread box. Consider these factors:

Wood Selection

Hardwoods such as oak, maple, cherry, or walnut are ideal due to their durability and resistance to moisture. These woods offer a refined appearance and can withstand the daily wear and tear associated with a frequently used kitchen appliance. Softwoods like pine or cedar are less expensive but may be more susceptible to scratches and dents. Cedar possesses natural aromatic properties, which may impart a subtle fragrance to the bread, a feature that some bakers find appealing. Ultimately, the choice depends on your budget and aesthetic preferences.

Ensure your chosen wood is properly seasoned; this will minimize warping and cracking during and after construction. Look for wood that is free of knots and imperfections, especially if intricate joinery is involved. The smoother the wood, the better the finished product will be.

Essential Tools

Before embarking on your project, gather the necessary tools to ensure a smooth and efficient construction process. This will include:

  • Measuring tape and pencil
  • Circular saw or hand saw
  • Wood planer (for smoothing surfaces)
  • Chisels (various sizes)
  • Sandpaper (various grits)
  • Wood glue
  • Clamps
  • Screwdriver (if using screws)
  • Drill (with appropriate drill bits)
  • Safety glasses and dust mask
  • Wood finish (e.g., varnish, oil, or stain - optional)

The specific tools needed may vary slightly depending on the chosen design and construction method. Always prioritize safety by wearing appropriate protective gear.

Simple Bread Box Designs

Several straightforward designs are accessible even for novice woodworkers. These designs often utilize basic joinery techniques, minimizing the complexity of construction.

The Classic Box Design

This involves creating a simple rectangular box with a hinged lid. The sides, bottom, and lid can be cut to the desired dimensions and assembled using wood glue and screws or dowels. This design provides ample space for various bread sizes and is easily customized with decorative elements or different wood types. Consider adding ventilation holes on the lid or sides to prevent moisture buildup.

The Sliding Lid Design

This design incorporates a sliding lid instead of a hinged one. The lid slides smoothly along grooves cut into the sides of the box. This design offers a clean, minimalist aesthetic and allows for easy access to the bread. Precision is key in this design to ensure a smooth sliding mechanism. Consider using drawer slides for a more refined feel.

The Farmhouse Style Bread Box

This rustic design often features a more substantial build, thicker wood, and visible joinery. It can incorporate decorative elements such as carved details or metal hinges. The farmhouse style often uses a hinged lid and may include a small handle for easy opening.

Advanced Bread Box Designs

For experienced woodworkers, more intricate designs offer greater creative freedom and the opportunity to showcase advanced joinery techniques.

The Dovetail Joint Bread Box

This sophisticated design employs dovetail joinery, a strong and visually appealing method of joining wood pieces. Dovetail joints create a visually stunning and extremely durable connection, adding a touch of elegance to the bread box. However, this technique requires more skill and precision.

The Mortise and Tenon Bread Box

This method involves creating mortises (holes) in one piece of wood and tenons (projections) on another, fitting them together for a strong and secure joint. Similar to dovetail joints, mortise and tenon construction results in a sturdy and attractive bread box, though it requires careful planning and execution.

Finishing Your Bread Box

After construction, the final steps involve sanding, finishing, and potentially adding decorative elements.

Sanding and Finishing

Thoroughly sand all surfaces to achieve a smooth finish. Begin with coarser grit sandpaper and gradually progress to finer grits. Apply a wood finish such as food-safe oil, varnish, or beeswax to protect the wood from moisture and enhance its durability and appearance. Multiple coats may be necessary, depending on the chosen finish.

Adding Decorative Elements

Personalize your bread box by adding decorative touches. This could include burning designs into the wood, adding metal handles or hinges, or using contrasting wood species for accent pieces. Incorporate your personal style to create a unique and functional addition to your kitchen.

Maintaining Your Wooden Bread Box

Proper maintenance will ensure your bread box remains functional and attractive for years to come.

  • Regular Cleaning: Wipe down the interior and exterior of the box regularly with a damp cloth. Avoid using harsh chemicals or abrasive cleaners.
  • Oil Re-application: Periodically reapply food-safe oil to the wood to maintain its moisture and prevent cracking. The frequency depends on the type of oil and the environment.
  • Ventilation: Ensure adequate ventilation to prevent moisture buildup which can lead to mold growth. Ventilation holes or slats are beneficial for this purpose.
  • Protection from Extreme Temperatures and Humidity: Avoid placing the bread box near heat sources or in damp areas.

By following these guidelines, you can create a beautiful and functional DIY wooden bread box, preserving the freshness and flavor of your homemade bread for longer.

DIY Wooden Bread Box Ideas That Will Keep Your Bread Fresher Than Ever

Maintaining the freshness of bread is a culinary pursuit that transcends mere storage; it's an art form dedicated to preserving texture, flavor, and the overall sensory experience. While commercial bread boxes are readily available, crafting a personalized wooden bread box offers a rewarding project that not only enhances kitchen aesthetics but also provides superior bread preservation. This article explores several DIY wooden bread box designs, offering detailed guidance for various skill levels and aesthetic preferences. From simple rustic designs to more intricate handcrafted creations, we will delve into the materials, tools, and techniques required to build your own custom bread box.

Understanding the Importance of Proper Bread Storage

Before embarking on the construction phase, it's crucial to understand why a dedicated bread box is superior to alternative storage methods. Exposure to air, fluctuating temperatures, and excessive moisture are the primary culprits behind stale bread. A well-designed wooden bread box mitigates these factors. The wood acts as a natural insulator, maintaining a relatively stable temperature and humidity level, slowing down the staling process considerably. The enclosed design limits air exposure, thus preventing the bread from drying out prematurely. This leads to bread that retains its softness, moisture, and overall deliciousness for a significantly longer period.

Choosing Your Design and Materials

The design of your DIY wooden bread box is limited only by your imagination and woodworking skills. However, several fundamental design considerations should guide your choice:

Simple Rectangular Box

This is the most straightforward design, suitable for beginners. It typically involves a simple box construction with a hinged lid. The focus is on functionality and ease of construction. Materials could include readily available pine or fir lumber, providing an economical and readily workable option.

Rustic Farmhouse Style

This design often incorporates reclaimed wood, creating a charming, rustic aesthetic. The box might feature distressed finishes, visible wood grain, and possibly metal hardware for a more antique look. Reclaimed wood adds character, and the imperfections inherent in the material contribute to its unique appeal. Consider using thicker boards for a more substantial feel.

Elegant Shaker Style

Known for its clean lines and minimalist design, a Shaker-style bread box emphasizes simplicity and functionality. This design usually employs dovetail joints, showcasing precise joinery skills. The wood choice might lean towards hardwoods like maple or cherry, creating a sophisticated and timeless piece.

Material Selection and Preparation

The choice of wood is a critical aspect. Softer woods like pine and fir are easier to work with, ideal for beginners, but might require more frequent maintenance. Hardwoods like oak, maple, and cherry are more durable and resistant to wear but require more advanced woodworking skills to cut and shape correctly. Regardless of your choice, ensure the wood is properly dried to avoid warping or cracking. Sanding to a smooth finish is essential for both aesthetics and ease of cleaning.

Essential Tools and Techniques

The tools required depend largely on the chosen design and your woodworking proficiency. However, a basic set of tools should include:

  • Measuring tape and pencil
  • Hand saw or circular saw
  • Wood plane or sander
  • Chisels (if using more intricate joinery)
  • Clamps
  • Screwdriver or drill
  • Wood glue
  • Sandpaper (various grits)
  • Hinges
  • Wood finish (optional, such as varnish, oil, or paint)

Important Note: Always prioritize safety. Wear appropriate safety glasses and hearing protection when using power tools. Follow the manufacturer's instructions for all tools and equipment.

Step-by-Step Construction Guide (Simple Rectangular Box)

This guide focuses on the simplest design â€" a rectangular bread box. Adapt these steps to your chosen design, keeping in mind the necessary modifications in joinery and dimensions:

  1. Cut the Wood: Measure and cut the wood pieces for the box sides, bottom, and lid according to your desired dimensions. Ensure all cuts are precise and square.
  2. Assemble the Box: Apply wood glue to the edges and assemble the sides and bottom, using screws or nails to secure the joints. Clamp the pieces together until the glue dries completely.
  3. Attach the Lid: Attach hinges to the top edge of the box and the bottom edge of the lid. Ensure the hinges are properly aligned to allow the lid to open and close smoothly.
  4. Sanding and Finishing: Once the glue is dry, sand all surfaces thoroughly to a smooth finish, starting with coarser grit sandpaper and gradually moving to finer grits. Apply your chosen wood finish, following the manufacturer's instructions. Allow ample drying time.

Advanced Techniques and Design Elements

For more advanced designs, consider incorporating these techniques:

  • Dovetail Joints: These intricate joints create a strong and visually appealing connection between the box sides and bottom. They require more skill but produce a superior, more durable outcome.
  • Mortise and Tenon Joints: Another strong jointing technique, mortise and tenon joints provide excellent stability and are less visually prominent than dovetails.
  • Inlays and Carving: Add decorative elements through wood inlays or carving techniques, enhancing the aesthetic appeal of your bread box.
  • Metal Hardware: Incorporate metal handles, latches, or hinges to complement the overall design and provide added functionality.

Maintenance and Care

Proper care will extend the life and beauty of your wooden bread box. Avoid placing it near heat sources or in areas with high humidity. Periodically clean the interior with a damp cloth. If using a finished wood, apply a fresh coat of finish as needed to maintain its protection and aesthetic appeal. With proper care, your hand-crafted bread box will serve as a functional and stylish addition to your kitchen for years to come.

Creating a DIY wooden bread box is a rewarding project that combines creativity, woodworking skills, and a touch of culinary appreciation. By following these guidelines and letting your imagination guide the design, you can craft a truly unique and functional piece that keeps your bread fresher and your kitchen more beautiful.

These DIY Wooden Bread Box Ideas Will Make Your Kitchen Shine!

Hey there, fellow kitchen enthusiasts! Let's talk about something that's both practical and pretty: bread boxes! Forget those flimsy plastic things â€" we're diving headfirst into the world of DIY wooden bread boxes. Not only will these beauties keep your bread fresh, but they'll also add a touch of rustic charm (or modern sleekness, depending on your style!) to your kitchen. And the best part? They’re surprisingly easy to make!

Why a DIY Wooden Bread Box?

Before we jump into the fun stuff (building!), let's talk about why you should even *consider* making your own bread box. Honestly, there are so many reasons! First off, you get complete control over the design. Want a farmhouse chic style? A sleek minimalist box? A vibrant, colour-blocked masterpiece? You name it, you can build it!

Secondly, it’s a fantastic way to upcycle old wood. Got some reclaimed pallet wood lying around? Perfect! That old door you were going to throw away? It could be the perfect bread box! Upcycling is both eco-friendly and incredibly rewarding.

And finally, let's be real â€" a handcrafted wooden bread box just *feels* better. It's a tangible representation of your skills and creativity, something you can be proud of every time you reach for a slice of fresh bread. Plus, your friends will be seriously impressed!

Choosing Your Style and Materials

The beauty of a DIY project is the endless possibilities! Before you grab your tools, let’s brainstorm some design ideas and gather the materials you'll need.

Style Inspiration

Think about the overall aesthetic of your kitchen. Do you prefer a rustic farmhouse look, a modern minimalist vibe, or something completely unique? Here are a few ideas to get your creative juices flowing:

  • Rustic Farmhouse: Think distressed wood, maybe some metal accents, perhaps even a chalkboard panel on the front for writing down the bread type or baking date.
  • Modern Minimalist: Clean lines, simple geometry, perhaps a light-colored wood with a smooth finish. Think functionality and elegance.
  • Shabby Chic: A slightly distressed finish with pastel colors or decorative knobs. This style is all about charming imperfection.
  • Mid-Century Modern: Think tapered legs, clean lines, and a focus on natural wood grain.
  • Bohemian: Incorporate unique textures, interesting wood combinations, and possibly some decorative carving.

Essential Materials

The specific materials will depend on your chosen style, but here's a general list:

  • Wood: This is your primary material. Choose a type that's relatively easy to work with, such as pine, cedar, or even reclaimed wood.
  • Wood Glue:
  • Screws or Nails:
  • Sandpaper (various grits):
  • Wood Stain or Paint (optional):
  • Wood Finish (polyurethane or varnish):
  • Measuring Tape and Pencil:
  • Saw (hand saw, circular saw, or jigsaw):
  • Drill (with appropriate drill bits):
  • Clamps (helpful for gluing):
  • Safety Glasses and Dust Mask:

Remember to always prioritize safety! Wear safety glasses and a dust mask when sawing and sanding.

Simple Bread Box Designs

Let's look at a couple of easy-to-follow bread box designs, perfect for beginners.

The Classic Box Design

This is the simplest design: a rectangular box with a hinged lid. You can make it as simple or as ornate as you like. Cut your wood pieces to the desired dimensions, assemble them using wood glue and screws, sand down the edges, apply your chosen finish (stain, paint, or clear coat), and voilà! You've got a functional bread box.

The Sliding Lid Design

A slightly more advanced project, this design features a sliding lid instead of a hinged one. This requires more precise cuts and some careful planning, but the end result is a sleek and modern bread box. You’ll need to create grooves for the lid to slide smoothly.

Adding Extra Flair

Once you’ve mastered the basics, you can add some personal touches! Here are some ideas:

  • Decorative Hardware: Add stylish knobs or handles to the lid or front.
  • Inlay Work: Use contrasting wood pieces to create patterns or designs.
  • Etching or Carving: Add personalized designs or lettering.
  • Painting or Stenciling: Add colour and personality with paint or stencils.
  • Adding Feet: Raise your bread box off the counter with small wooden feet for a more elevated look.

Advanced Bread Box Projects

Feeling adventurous? Once you've got the basics down, you can try some more challenging projects:

  • Bread Box with Cutting Board Top:
  • Built-in Bread Box:
  • Bread Box with Drawers for storage of other items:

Finishing Touches and Maintenance

Once your bread box is assembled, sanding is crucial for a smooth finish. Start with coarser sandpaper and gradually move to finer grits. Apply your chosen stain or paint, allowing ample drying time between coats. Finally, seal it with a clear coat of polyurethane or varnish to protect the wood and make it easy to clean.

Commonly Asked Questions

Q: What type of wood is best for a bread box?

A: Pine, cedar, and oak are all popular choices. Choose a wood that's easy to work with and relatively resistant to moisture.

Q: How do I prevent mold and mildew in my bread box?

A: Proper ventilation is key. Ensure your bread box design allows for some airflow. Also, keep the bread box clean and dry. Don't store damp bread in it.

Q: How much does it cost to make a DIY bread box?

A: The cost varies greatly depending on the materials you use. You can create a beautiful bread box for as little as $20-$30, or spend more if you choose more expensive wood or hardware.

Q: What if I don’t have any woodworking experience?

A: Don’t worry! Start with a simple design and take your time. There are tons of tutorials and resources online that can guide you through each step. Don't be afraid to ask for help from a more experienced woodworker.

So there you have it! Making your own wooden bread box is a rewarding project that will add charm and functionality to your kitchen. Get creative, have fun, and enjoy the process!

DIY Wooden Bread Box Ideas for Organizing Kitchen Essentials

The humble bread box, once a staple in every kitchen, is experiencing a resurgence. No longer relegated to simply storing bread, the modern bread box offers a versatile storage solution for a variety of kitchen essentials. This article explores the design and construction of DIY wooden bread boxes, focusing on both functionality and aesthetic appeal, providing detailed instructions and design inspiration for crafting your own unique piece.

Design Considerations: Functionality and Aesthetics

Before embarking on your DIY project, careful consideration of design parameters is crucial. The functionality of your bread box must align with your specific needs, while the aesthetic design should complement your existing kitchen décor. This involves decisions regarding size, style, wood type, and finishing techniques.

Size and Capacity

The size of your bread box will directly influence its capacity. Consider the typical amount of bread you consume, as well as any other items you plan to store. A smaller box may suffice for a single person or couple, while a larger box is necessary for a larger household. Consider the dimensions of standard loaves of bread to ensure adequate internal space. Accurate measurements are paramount to avoid construction issues.

Style and Design

The style of your bread box can range from rustic and farmhouse-inspired to modern and minimalist. Rustic designs often feature distressed wood finishes and simple, unadorned lines. Modern designs may incorporate sleek lines, clean geometry, and potentially even integrated handles or latches. Consider the overall style of your kitchen and choose a design that complements its existing aesthetic. Exploring online resources, such as Pinterest and design blogs, can provide inspiration and visualization.

Wood Selection

The choice of wood significantly impacts the durability, appearance, and workability of your bread box. Hardwoods such as oak, maple, and cherry are desirable due to their strength, durability, and attractive grain patterns. They are, however, generally more expensive. Softwoods like pine and cedar offer a more budget-friendly alternative, though they are less resistant to wear and tear. Pine, with its readily available and affordable nature, remains a popular choice for DIY projects. Consider the inherent properties of the wood, its ease of workability with your chosen tools, and the final aesthetic you desire.

Construction Techniques: A Step-by-Step Guide

The construction of a wooden bread box involves several crucial steps, from initial planning and cutting to assembly and finishing. Precision and attention to detail are essential to ensure a sturdy and aesthetically pleasing result. This section outlines a detailed process for constructing a simple, rectangular bread box.

Materials List

Before commencing, compile a comprehensive list of materials, ensuring you have all necessary components on hand. A typical list would include:

  • Wooden planks (consider the dimensions based on your desired bread box size)
  • Wood glue
  • Wood screws (appropriate length and gauge)
  • Sandpaper (various grits)
  • Wood stain or paint (optional)
  • Clear sealant (optional)
  • Measuring tape
  • Saw (circular saw or hand saw)
  • Drill
  • Screwdriver
  • Clamps
  • Safety glasses

Cutting and Shaping

Begin by accurately measuring and cutting the wooden planks to the required dimensions for the sides, top, bottom, and front/back panels. Ensure all cuts are square and precise. Use a miter saw or hand saw for accurate cuts, paying close attention to detail. Any imperfections in the cutting stage will significantly impact the final aesthetic and structural integrity. Consider using a jig or template for repetitive cuts to ensure consistency.

Assembly

Assemble the bread box using wood glue and screws. Start by attaching the sides to the bottom panel, ensuring the joints are tight and square. Then attach the top panel and front/back panels. Use clamps to hold the pieces together securely while the glue dries. Pre-drilling pilot holes before screwing will prevent the wood from splitting. Ensure all screws are countersunk to avoid protruding heads.

Finishing Touches

Once the glue is fully dry, sand the entire bread box thoroughly, starting with a coarser grit sandpaper and gradually moving to finer grits. This will create a smooth surface and eliminate any imperfections. Apply wood stain or paint according to the manufacturer's instructions, allowing sufficient drying time between coats. Finally, apply a clear sealant to protect the wood from moisture and damage. This will enhance its longevity and prevent warping. Consider adding handles or latches for functionality and aesthetic appeal.

Beyond the Basics: Advanced Bread Box Designs

While the basic rectangular bread box offers a practical storage solution, there is ample room for creativity and customization. This section explores more intricate designs that incorporate advanced construction techniques and stylistic elements.

Incorporating Drawers or Compartments

Add functionality by incorporating drawers or compartments to store smaller kitchen essentials alongside bread. This can be achieved by constructing smaller boxes within the main bread box structure or by building dedicated drawer units that slide smoothly within the main body. Precise measurements and skilled joinery are essential for successful drawer integration.

Creating Unique Shapes and Styles

Explore unconventional shapes beyond the basic rectangular design. Consider creating a curved bread box using techniques such as steam bending or employing a router to shape the wooden panels. Experiment with different joinery techniques, such as dovetail joints, to enhance the structural integrity and visual appeal of the bread box.

Adding Decorative Elements

Enhance the aesthetic appeal of your bread box with decorative elements. Intricate carvings, inlaid designs, or decorative metal hardware can elevate the bread box from a simple storage unit to a statement piece in your kitchen. Consider using stencils for painting designs or burning patterns into the wood for a rustic look. The possibilities are limited only by your creativity and skill level.

In conclusion, crafting a DIY wooden bread box offers a rewarding experience, allowing for personalized design and functionality to meet individual needs. By carefully planning your design, selecting appropriate materials, and executing precise construction techniques, you can create a beautiful and functional addition to your kitchen, while also enjoying the satisfaction of creating something unique and enduring.

Enhancing Hallway Aesthetics and Functionality: A Comprehensive Exploration of Decorative Wooden Box Designs for Storage

Hallways, often overlooked spaces in domestic architecture, present a unique design challenge. They must balance functionality with aesthetic appeal, serving as both thoroughfares and potential storage solutions. The strategic integration of decorative wooden boxes offers a sophisticated approach to addressing this challenge, seamlessly blending practicality with refined design. This exploration delves into the diverse world of wooden box designs, exploring their versatility, material considerations, and aesthetic applications within the hallway context.

The Versatility of Wooden Boxes in Hallway Storage

Wooden boxes, far from being merely utilitarian containers, represent a versatile design element that adapts to a multitude of hallway storage needs. Their adaptability stems from their capacity to accommodate a wide range of items, from keys and mail to gloves and scarves, while simultaneously enhancing the hallway's visual character. This versatility allows for customized solutions, catering to the specific storage demands of each individual household.

Categorizing Storage Needs

Effective hallway storage begins with a comprehensive assessment of storage needs. Consider the following categories:

  • Everyday essentials: Keys, wallets, mail, sunglasses.
  • Seasonal items: Gloves, scarves, hats.
  • Household supplies: Extra light bulbs, batteries, cleaning supplies (in smaller, discreet boxes).
  • Decorative items: Small plants, books, photographs.

By categorizing these needs, you can determine the appropriate size, number, and style of wooden boxes required to optimize hallway storage and maintain a visually appealing environment.

Adapting Box Designs to Specific Needs

The choice of wooden box design should directly reflect the intended purpose. For example, shallow, wide boxes are ideal for mail and keys, while taller, narrower boxes might accommodate scarves and gloves. Boxes with internal dividers can further enhance organization, separating items within a single container. The integration of discreet labels or subtly engraved markings can further improve functionality and visual appeal.

Material Considerations and Aesthetic Choices

The selection of wood type significantly impacts both the aesthetic and functional aspects of the wooden boxes. Different woods possess distinct characteristics, influencing durability, appearance, and cost. Careful consideration of these factors is crucial in creating a cohesive and visually harmonious hallway design.

Wood Species and Their Properties

A diverse range of wood species offer unique qualities:

  • Oak: Known for its strength, durability, and rich grain patterns, oak provides a classic and sophisticated look.
  • Pine: A more affordable option, pine is lightweight yet durable, often featuring a warm, inviting aesthetic.
  • Cherry: Characterized by its reddish-brown hues and fine grain, cherry offers a luxurious and elegant feel.
  • Walnut: Renowned for its dark, richly colored grain, walnut exudes a sense of sophistication and timeless elegance.
  • Mahogany: Celebrated for its deep reddish-brown color and lustrous finish, mahogany contributes a touch of opulence and timeless style.

The choice of wood should complement the existing hallway decor and overall design scheme of the home.

Finishes and Decorative Elements

Beyond the wood itself, finishes and decorative elements contribute to the overall aesthetic impact. A simple, natural finish can highlight the wood's inherent beauty, while stained or painted finishes allow for greater customization and personalization. Incorporating decorative elements such as:

  • Metal hardware: Antique brass, brushed nickel, or polished chrome handles can add a touch of elegance and functionality.
  • Inlays: Intricate wood or metal inlays can elevate the design to a higher level of artistry.
  • Etching or engraving: Personalized monograms or decorative motifs can personalize the boxes and add a unique touch.

These decorative elements can further enhance the visual appeal of the wooden boxes, ensuring they seamlessly integrate with the hallway's existing design.

Integrating Wooden Boxes into Hallway Design

The successful integration of decorative wooden boxes into a hallway requires careful consideration of placement, grouping, and overall design harmony. Strategic placement maximizes both functionality and aesthetic impact. The boxes should complement, rather than detract from, the existing decor.

Placement Strategies

Consider these placement options:

  • On a console table or entryway table: Provides a centralized and readily accessible storage solution.
  • On built-in shelving: Creates a cohesive and visually appealing storage system.
  • Stacked on the floor (if space allows): Creates a visually interesting display, provided the boxes are suitably sized and styled.
  • Within a dedicated storage unit: Provides a more organized and discreet storage solution.

Grouping and Visual Harmony

Grouping similar boxes creates a cohesive and visually pleasing effect. Consider using boxes of the same wood type, finish, and size for a unified appearance. Alternatively, using boxes with a consistent design element, such as matching hardware, can create a visually cohesive collection even with variations in size or wood type. The overall design should complement the existing hallway decor, ensuring a harmonious and aesthetically pleasing result.

Conclusion

Decorative wooden boxes offer a sophisticated and practical solution to hallway storage challenges. By carefully considering material choices, design elements, and placement strategies, homeowners can create a functional and visually appealing storage system that enhances the overall aesthetic of their hallway. The versatility of wooden boxes allows for customization to meet individual needs, transforming a frequently overlooked space into a stylish and organized area.